Tuesday 31 January 2012

Arrays

And then there were many!!!
Cloning has become a reality, at least a virtual reality! Forget Dolly, think fence posts!!
By creating a single post using the box preset and bevelling tool, I then went into tools and selected the array tab. This gives you the cloning options. From here it just becomes a matter of filling in how many copies you require. Cake walk :)


Loft

I think, despite my abismal drawing skills, it is immediatley apparent that this is a.... donkey... just making sure your awake, it should in fact resemble a coat hanger!
This attempt started life as a simple line drawing in 3D Studio Max using the Line Spline Tool. This represents the path of the final product. A small circle was created that will represent the shape of the coat hanger.
Again, using the Compound Objects section I selected the loft tool. Depending upon the existing selection (path or shape) it prompted me to select the path or shape. This essentially gives the path the shape of the circle, creating a 3D coat hanger.
It's just that simple!!!


Booleans

Imprinting for the computer!! This tool allows you to either cut a shape out of an object or to imprint it into the object.
Here I just created a box from the preset shapes and wrote a letter using the Spline Text tool. The letter was modified in order to make it deeper than the box. Initially the letter was simply laid on top, when it was positioned I selected the Create tab and within that Compound object then Boolean. You are then given the choice to choose anither operand, as I had the box selected I chose the letter and IT'S GONE!!! Left in its' place is the imprint, depending upon the initial positioning of the letter this either leaves a hole through the box or an indent.


Lathing

Take the mirror image of an object and miraculously transform it into a 3D model!!
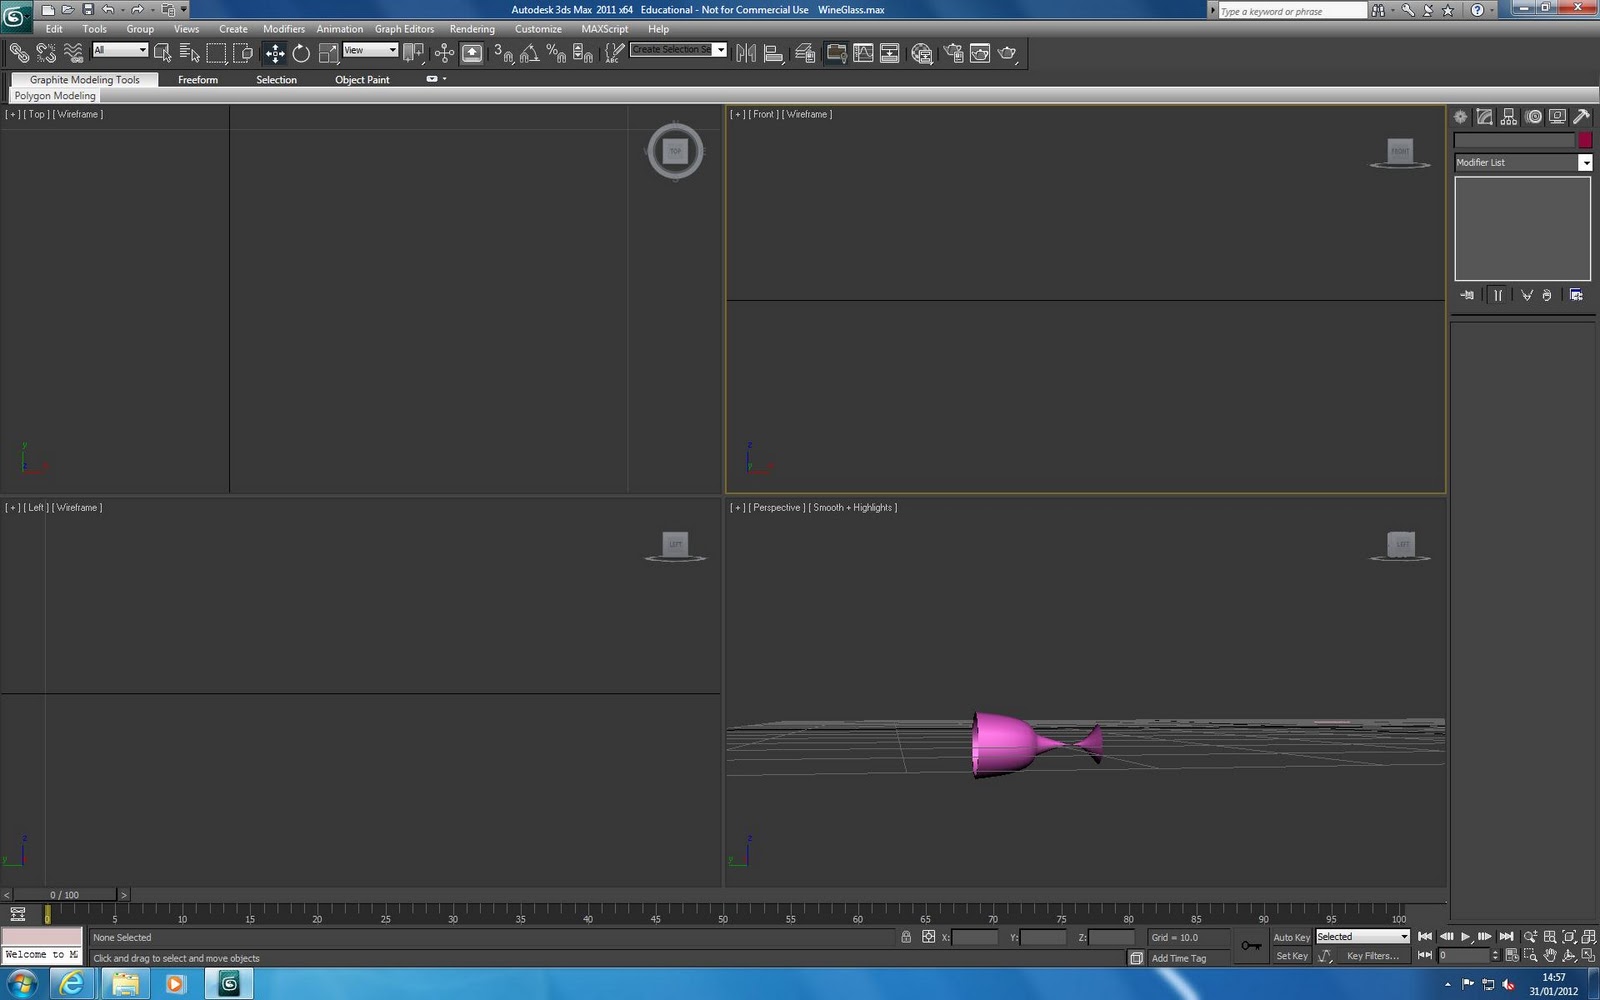
Having drawn a half, mirror image of a glass it was then imported into Studion 3D Max.
The pivot point was, by default, placed in the centre of the image. I moved this by going into the Hierachy tab and clicking the option to Affect Pivot Point, then it was just a matter of dragging it to the desired position, easy peasy :)
When the pivot point was in the right position, I returned to the Modify tab and from the drop down menu chose Lathe....instant wine glass!! Ta DAAA
Sometimes the object came out completly black indicating that they were inside out, this was fixed by simply clicking the flip normals box when lathing.

The most challenging part was getting the pivot point in the right place, more than once my glass had a tube running through the centre because the pivot point was not close enough to the mirror line. Just a bit of trial and error to repair that.

Behold the wine glass!!!

Tuesday 24 January 2012

Fruit Bowl

Who would have guessed that a bowl of fruit would be so difficult to create!! Specifically, a banana. Of all things this simple yellow fruit has given me more trouble than any other!!
The apple and pear were relatively easy to model, just starting with a sphere and then battering them into a more natural imperfection by using the Soft Selection tools, slowly moulding them into their more realistic, lumpy selves.
The banana was slightly more challenging. To be perfectly honest, the early attempts looked nothing short of a crushed beer can, far removed from the intended bananary target. However, with a little help and advice, the Bevel and Bend tools came to the rescue, allowing me to model something that vaguely resembles its yellowy cousin.

Thanks to this exercise, I will never look at a bowl of fruit quite the same way again.

The White House

Behold!!! The White House in amazing 3D, as if you were standing right next to it.....sort of.

Having never worked with Studio 3D Max before, I found that the basic controls were surprisingly easy to use with very useful library shapes to work with. The align tools helped a lot with making the different components fit together exactly (the perfectionists' dream).
The different viewports, although daunting at an initial glance, proved very user-friendly, giving me the ability to see various angles quickly.
With a little help, it also became possible to magically transform a cylinder into a triangular-based pyramid by manipulating the number of flat sides to 3. From this Modify menu, it also became possible to edit the number of height segments to keep the polygon count down, good practice when you have more complex shapes. As you can see from the various screen shots, the polygon count has decreased by removing unnecessary segments.


All-in-all...so far, so good!!

The Brief - First Impressions

Enter Leonardo Da Vinci!! The brief is to model and animate one of Leonardo's inventions in 3D. It seems like an interesting topic with a lot of scope for experimentation and, with plenty of innovative creations to choose from, the chance to really create and play with some of Da Vinci's groundbreaking inventions!
Bring it on!!!